Wednesday 30 March 2011

EOTD March 30th: Catrice Quad 010 The Season's Must Have! #2

Hi there!
A little ago I did this review about the Catrice 010 The Season's Must Have! quad *click* and then did this pretty dramatic look *click* with it.
Well, here's another looks with this quad that is way more natural!
I just put the champagne rose color onto my lid, only leaving out the very outer corner. Then I tried to apply the torquoise color to the outer corner, but it didn't really work. I had to layer it a thousand times :P You already know that I don't like the pigmentation of this color... Then I added the grey color to my crease, but more to the center part of it, not too far outward.
For eyeliner I applied the p2 perfect look kajal in 02 brown to my upper lashline and waterline, but only the outer 2 thirds of each of it. Then all you need is mascara, I used the Maybelline Colossal Volum' one in glam brown.
Well, that's it! Here you have a neutral eye with cool colors.
Do you like it?
xoxo, Misch

Tuesday 29 March 2011

NOTD March 29th: Japanese Cherry Blossom Nail Art

Hi everyone,
today I have a nice little nail art design for you! I did it this weekend because it was Cherry Blossom Day. I don't celebrate it, but I thought it'd be fun for that occasion! And it's a really cute spring design that some of you might want to wear, too!

That's what you need:
- a base coat of your choice (I used Essence Pro White French)
- a white opaque polish (I used Essence Nail Art Stampy Polish White)
- a black polish with a thin brush/ a regular black color (I used the RdLY nail art pen in black)
- a pink color (I used Essie - Exotic Liras)
- a pale rose color (I used Essie - Guchi Muchi Puchi)
- a toothpick for the blossoms
- a top coat of your choice (I used Essence Nail Art Sealing Top Coat)
That's how to do it:
1. Use your base coat all over your nails to protect them.
2. Paint a little more than the tips of your nails opaque white. I did it free-hand and rotated my hand to create a straighter line. You can also use tip guides and you don't have to do the line as straight as I did. Choose what you like!
3. Take your black polish with the thin brush (or use a toothpick and a regular black polish) and draw the trees with the branches. Do as many as you like, do them on half of the nail, or the whole one, it's all up to you!
4. Pick up some of the pink color with your toothpick and put some flowers onto the ends of all the branches.
5. Pick up the pale rose color with the toothpick and add them as spots to a few of the pink flowers. This will add some dimension and make it look a little more real.
6. Use your topcoat to protect the design.
I'm totally aware of the fact that real japanese cherry blossoms aren't as pink as mine are, but I just liked the color and added that as my little own twist on it.
To see a video on how to do it, *click* here and you'll see the one by cutepolish! This video was my inspiration, but I didn't totally stick to her way of doing it.

Do you like it??
xoxo, Misch

Monday 28 March 2011

Review: Essence Gel Eyeliner Brush

Hi guys,
Well, after you just saw my THANK YOU POST *click*, here's today's "real" post:

Today's review is about another brush by Essence, their new Gel Eyeliner Brush.
I already introduced you to the Smokey Eyes Brush *click* a couple of days ago. The gel eyeliner brush has a black handle and blue hair, with the Essence logo in blue on the handle. With the bristles the brush is about 16 cm long and it costs 1.45 Euros at most drugstores. The brush is angled, or slanted, depending on how you wanna call it ;).
The bristles are about 7 mm wide and 5 mm to 7 mm long. You're supposed to apply gel eyeliner with it, but it also works for eyeshadows. You can also apply thicker lines with the wide side of it.
I personally prefer to apply my gel eyeliner with a small brush like the one by Alverde, and not slanted ones, but it works okay for me with this one. I also use it to fill in my brows. Doing an eyeshadow liner with this is okay, but it works better with gel eyeliner. The lines might not get too thin on the back of my hand, but they get opaque for sure, so that's great!
It's easy to clean, it didn't lose any hair and all of the leftover liner got out of it.
I compared it to my TheBodyShop slanted brush, and the Essence one is way smaller.
left: TheBodyShop
right: Essence
I personally prefer the one by TheBodyShop a little over the Essence one, because the bristles are here more dense apply the shadows/liner better. But the one by TheBodyShop also costs about 4 times more than the Essence one.


Do I recommend it? Yes, I do. You're not gonna get the best quality ever, but for the money you have to pay it's more than appropriate. I like it a lot!
What do you think of it?
xoxo, Misch

Thank you so so much!!

Hi everyone,
before I will post today's regular post, I quickly wanted to thank you all!
I now have 17 followers, and I never thought that so many people would be interested in my opinion or how I do my make-up, so this is so amazing! I love every single follower, and I just wanted to let you know that I appreciate it so much! It's amazing to have someone who is interested in my stuff, and it's amazing get all of these sweet comments by everyone! I don't care about how many people read my blog, of course it's great to know that there are some :), but as long as there is one single person appreciating what I do, I'll keep it up!
I also want to thank the wonderful Salander *click* who gave me a shout-out. Because of that blogpost I now have even more followers, and that's so cool! You're amazing, thank you so much!! <3
Clicking onto my blog and seeing all the new followers and comments totally made my day! <3
I'll see you guys later!
xoxo, Misch :)

Sunday 27 March 2011

EOTD March 27th: Catrice Quad 010 The Season's Must Have!

Hi guys,
as I promised in this review *click*, I did an EOTD using the Catrice Quad in 010 The Season's Must Have!.
 When I saw the quad this look immediately came to my mind, and I had to do it.
Unfortunately it didn't turn out to be that easy, because the torquoise barely showed up, so I had to layer it and apply it wet. And the eyeliner was far from easy to do, because it didn't work too well with the brush I used (Essence Gel Eyeliner Brush, review is coming tomorrow) and wasn't opaque enough. Maybe the day just wasn't right, but with a lot of patience it finally worked out.
On the inner half of the lid I applied the shimmery metallic campagne color and on the outer half the shimmer pale torquoise. In the crease I put the shimmery light grey color, and then did the thick eyeliner and a wing with the plummy grey matter shade. On the lower lashline I applied the champagne on the inner third, then lined the rest with the matte grey and connected it to the wing. To blend them together I used the shimmery grey.
On the outer half of the waterliner I applied the p2 pefect look kajal in brown, and for mascara I wore 2 coats of the Diamond Wish Mascara by Rival de Loop Young. And that's it!
Do you like this look? It's a little dramatic, but still wearable, especially for nighttime.

Until next time, xoxo, Misch

Saturday 26 March 2011

Review: Essence Nail Art Special Effect Topper

Hey there!
I have a new product from the Essence permanent line to show you today: one of the Nail Art Special Effect Toppers. There are -as far as I know- 5 different ones available, and I got one of them.
It's called 02 Circus Confetti and has a clear base with different-sized multi-colored glitter particles. It looks a little like Happy Birthday by Deborah Lippmann *click* and requires several coats to get opaque, but that's not what it's meant for. As the name says, it's a topper, so you're supposed to apply one or two layers of it over a color of your choice. You can pretty much use anything, but it mainly pops against dark colors. Black is the best color in my opinion, I'm sure it makes it look awesome! I'll try that soon for sure.
Since it contains that much glitter, it'll pretty hard to remove. Tough I haven't worn it yet that point is totally clear, it's always like that with these glitter polishes. I think it's worth the removal process, because I like how colorful and funny it is, but you definitely have to be patient with it. The surface gets pretty uneven, at least on the nail wheel, so I guess you should apply a topcoat over it. In the pictures you can see three thin layers of it.
Did you get any of the toppers yet?
I'll see you soon!
xoxo, Misch

Thursday 24 March 2011

Review: Catrice Absolute Eye Color Quad 010 The Season's Must Have!

Hey everyone,
today I have another review about a product from the new Catrice permanent line. It's about one for their brand-new eyeshadow quads, the Absolute Eye Color Quads. 
The one I got is called 010 The Season's Must Have! and it contains 4 pretty colors that aren't my normal color scheme. I normally always go for bronzes and warm browns, but even though there were also brown quads available, I liked this one the most. 
It contains a matte plummy grey color, a shimmery light grey, a shimmery torquoise color and a shimmery champagne rose color. The pigmentation is okay, the light grey and the champagne rose are the best, the matte plummy grey is a little patchy, but that's normal for a matte. The only real problem is the light torquoise color, it is barely noticeable on the eye, the only way to make it visible is to either layer it or use it wet. But the quad's nice nonetheless, you just have to be a little patient with this color. All of the colors are pretty cool, only the champagne one is a little warm. The shimmer is not junky or anything, you can't really feel it. They're not really noticeable on the lid, really light and no problems at all. I only wore them with an eyeshadow base, I always use one, and with that they lasted all day, no color-fading or creasing.  The quad costs 4.49 Euros and all 4 colors together are 8g, the plummy grey and the torquoise each 15.g and the light grey and the champagne each 2.5g. The packaging also looks really pretty and high-end with the clear plastic and the Catrice logo. I really like it!
All of the colors are really silky and soft.

Do I recommend it? Yes, mainly. If you don't mind the fact that the torquoise is not too pigmented and you can be a little patient with it and the slightly patchy matte color, it's okay to get it. The price is not too high, and I think it's appropriate for the quality. You might wanna look at the other colors, too, there are also warm quads available :) 
An EOTD with this quad is gonna follow soon!


Did you get any of the quads? Do you like them?
xoxo, Misch  

Wednesday 23 March 2011

Review: Essence Mini Lipgloss Set

Hi everyone,
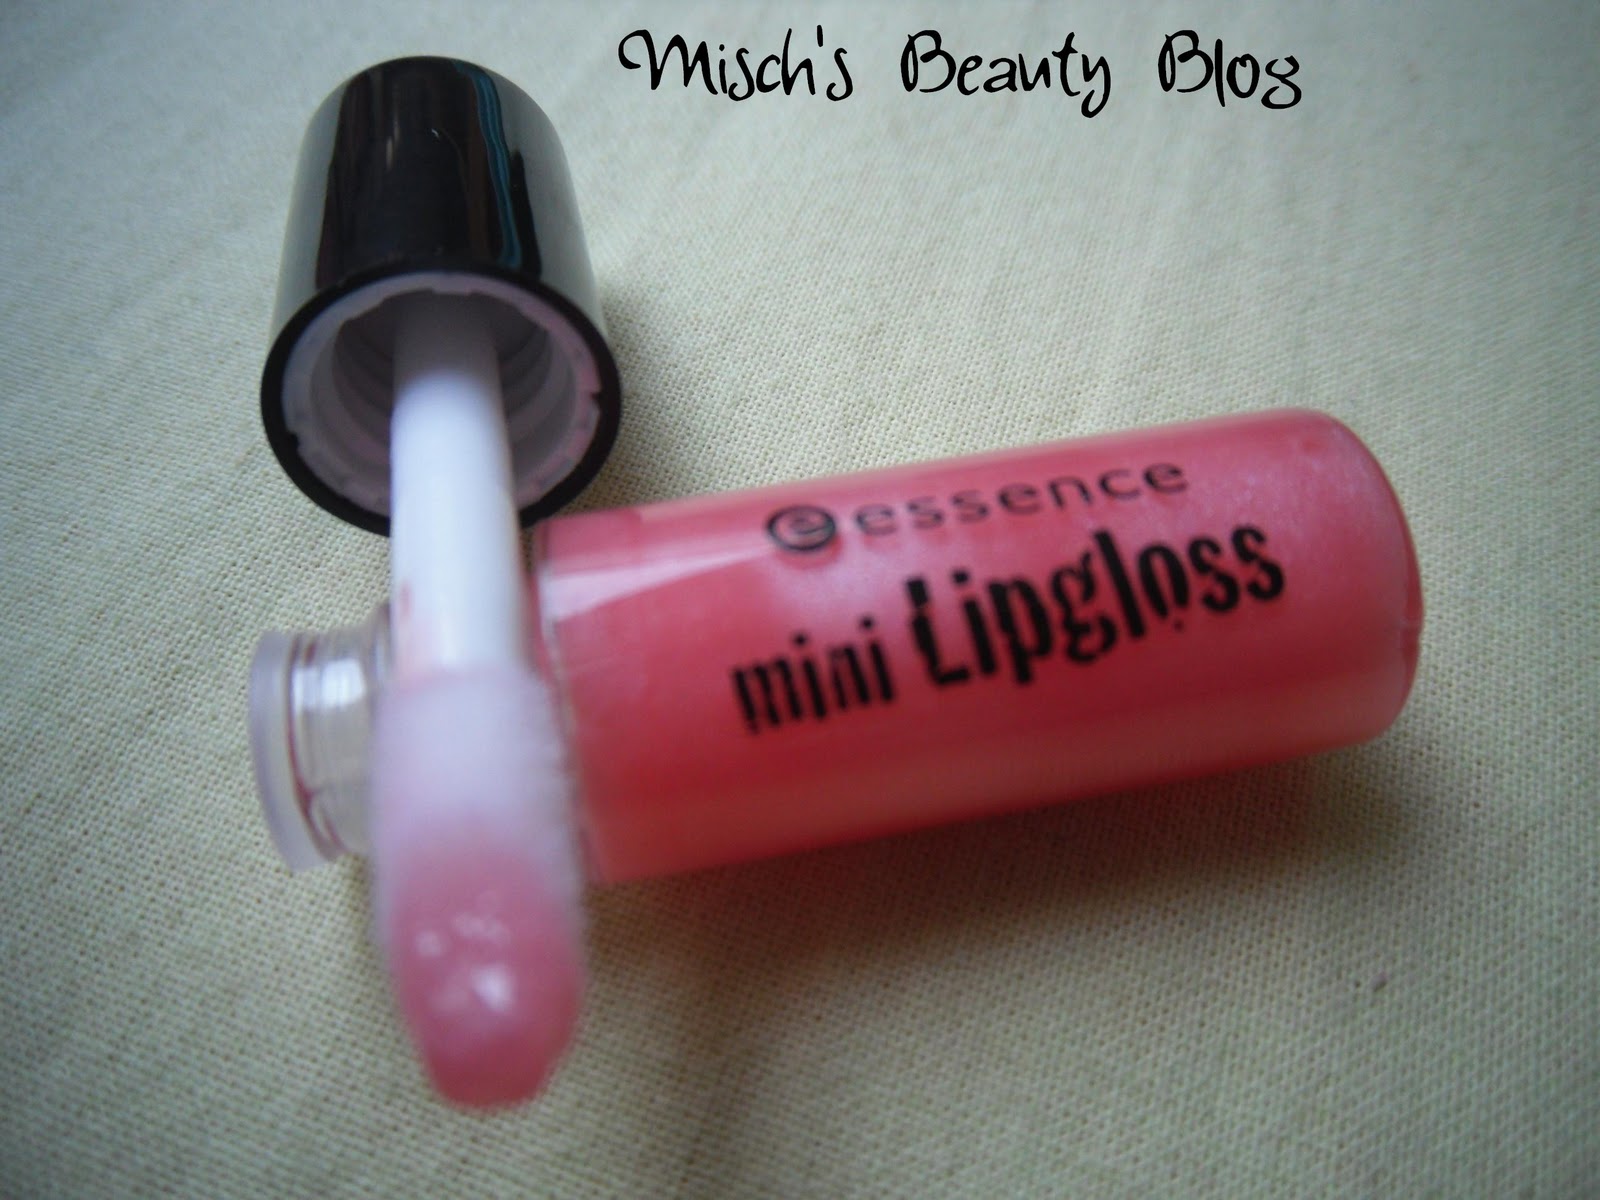
today I have the next Essence review, about a new product from the permanent line :) This time I'm gonna talk about the new Mini Lipgloss Set.
It contains 3 mini sized lipglosses that contain 2 ml/ 0.06 fl. oz. each.
The kit have here for a review is called Devil's Love and Kisses. It has hard carton packaging with detailing and patterns on it, mainly red, grey and white with a devil on it. It costs 2.45 Euros at the drugstore.

The lipglosses all contain shimmer & glitter particles.
The first color is clear and contains the biggest glitter particles which are silver and really obvious, especially because there's no actual gloss color. The second gloss is a soft reddish coral with the least visible glitter. I like this color the most, it's fun and summery. The last color is a cool pink with golden shimmer, and it looks pretty bright in the bottle. All glosses have a sponge-tip applicator.
The only problem with these glosses is the pigmentation. I really like the colors, they're fun and there is a clear, a warmer and a cool shade in it, and the glitter's not that bad. But you can barely tell which color is which on lip & hand swatches. That, of course, makes them all very wearable, but you just don't get the color you're expecting.

upper one: clear glitter
middle one: reddish coral
bottom one: pink
The texture of these is a little sticky but not too much, they remind me of the Eclipse Collection glosses *click*. The wear's okay, not too long, but definitely longer than an hour. After a while all of the glossiness is gone, only the glitter particles stay on your lips. The taste is very fruity and sweet, it's a little too much for my opinion, but it's still okay. It's in my opinion again comparable to the Eclipse Collection glosses.
Do I recommend this kit?
Well, not really. I'm disappointed because I thought that these might be a little pigmented, but they're not :P It'd be great for young girls starting off with make-up who don't expect too much and don't need too much color. But not everyone would like it, so think about buying this twice.

BTW: If anyone of you knows a lipgloss/lipstick that looks similar to the reddish coral gloss and that is opaque, please let me know! I love love love that color, and I'd like to have it for summer in an opaque version :) So please tell me if you know a similar color! The brand doesn't matter.
And I'm sorry that I can't provide you any lip-swatches, but these glosses are my sister's. She was already kind enough to let me test them, and I didn't want to use hers up ;)

Did anyone get these, too?
xoxo, Misch

Tuesday 22 March 2011

Review: Essence Smokey Eyes Brush

Hi there!
One of the products from the new Essence permanent line is the Smokey Eyes Brush. And here's my review on it!

It has a black handle with the name on it in purple, and it also has purple hair. The whole brush with the hair is about 15 cm long and it costs 1.25 Euros at most drugstores. 

The hair is really, really soft and also pretty dense. It's supposed to be used as a typical blending brush, but it's also really nice to apply an eyeshadow to either your crease or above it. I'd rather call it a round crease brush than a blending brush, for that it's just a little too tiny. Essence also recommends to use it as a smudger brush, but for that I prefer a real smudger or a pencil brush. 
It blends the eyeshadow colors nicely, and with it, you are able to apply certain colors as just a swipe, really lightly. You can even define your crease with this brush or blend the transition between lid and crease color, the size's perfect for that! The name "Smokey Eyes Brush" kinda hits the spot, it's perfect for smokey looks!
Washing's also no problem, it didn't lose any hair so far and it got perfectly clean with baby shampoo. 
It looked very similar to the Beliance round eyeshadow brush, but the one by Beliance is a little smaller and the hair is not as soft as the one by Essence. The Essence one is also fluffier.
I really recommend this brush, it's really inexpensive and great quality! Get it if you need a brush like this!
I'll see ya later!
xoxo, Misch

Nail Polish Collection Updates!

Hi guys!
I finally took the time to edit and update all of my Nail Polish Collection posts, yay! I didn't write new posts, I just added polishes and changed the pics to the posts from last summer :)  Here are the links, just click onto the names:

* Part #1: Goldes, Whites, Yellows and Glitters
* Part #2: Corals, Oranges and Reds
* Part #3: Roses and Pinks
* Part #4: Lilacs, Violetts and Purples
* Part #5: Blues
* Part #6: Greens
* Part #7: Browns, Silvers, Greys and Blacks
* Part #8: Base Coats, Top Coats and Care Stuff

Here you go! I also linked all the colors I already showed in NOTD posts in the several collection posts. Hope it's all clearer now :)

xoxo, Misch

Monday 21 March 2011

Review + NOTD: Catrice - 530 Up In The Air

Hi there!
Today's a review and a NOTD in one! It's about one of the new Catrice Ultimate Nail Lacquers, called 530 Up In The Air. It's a bluish lilac color.
At least I think it's like that, because it looks different all the time! Sometimes it's a pale blue, and then a pale cool lilac again. Whatever it really is, I love the color! It's really pretty :) I used it as the base color for the flower nail design you can see on the pics. I applied one coat of top coat over it, and it lasted a full week -yes, 7 days!- with just showing some tip wear after day 5, and that's amazing :) It can't be because of the top coat, because I use this topcoat all the time and the result and wear is never that good! Awesome! I really love the polish!
Now onto the nail art design:
I just drew some flowers on top of the color. The navy blue flowers are made with China Glaze Anchors Away - First Mate *click* and the almost white flowers are Catrice Floralista - C03 Lavender Breeze *click*. To see how to do this nail design, *click here*. I did it exactly the way that is shown in this video by CutePolish, it's described very well.
What do you think of it? Like it? I do for sure, and a lot of people seemed to, too, because I got a lot of compliments on it :)

I quickly want to tell you that there will be following a lot of reviews now, because I want to get all of the stuff from the permanent line changes through and still have a few things there...so hope you don't mind seeing almost nothing but reviews here...if so, please tell me, then I'll try to change it up a little! There are gonna be a few Essence reviews now coming up, all new products. Hope you'll enjoy them!

I'll see you guys soon!
xoxo, Misch

Sunday 20 March 2011

Review: Benefit Finding Mr. Bright

Hey there!
Today I finally have the review for the Benefit Finding Mr. Bright Kit. I already showed you some sneak-peek pics here *click*, and now I had enough time to try out all of these things and finally review them!
Let's get started, shall we?!


Benefit Girl Meets Pearl
Girl Meets Pearl is a pink fluid with a fine golden shimmer. It can be applied as a slight highlighter or all over the face. It illuminates the areas where you apply it and the slight shimmer kinda seems to make them look more even. The bottle in the kit contains 7.5 ml/0.25 fl oz. Benefit calls it a liquid pearl for the face, and that's true. The finish is a subtle glow, really pretty, and would match pretty much every skintone. It's pretty longlasting, but fades during the day, of course. It gives you a fresh and dewy appearance, too.
I think this might be my favorite product from the kit, and I don't think it gets the attention it deserves. All of the products in this kit are really well-known, but this one is the least popular...maybe a little underestimated?


Benefit PosieTint

PosieTint is pretty well-known, it's a Cheek and lip stain. To me, the formula is creamy while being liquid, and it's pretty pigmented. Benefit calls it a poppy pink color, but I'd rather say it's a bubble gum pink, but in a soft way. It's supposed to be tear-, weather- and water-proof, and that's true! When you apply it to your cheeks, you'd rather blend it out before it dries, or otherwise you'll end up with pink, hard-to-remove stripes on your cheeks :) The color's not really my kinda lipcolor, so I didn't wear it there, it was barely visible on my naturally dark lips. The bottle in the kit contains 4 ml/0.13 fl oz. The color lasts on my cheeks pretty long, almost all day.


Benefit HighBeam   

HighBeam is a very very well-known and popular highlighting product, a liqiud one. It's a cool off-white color with a lot of shimmer in it which works for pretty much all skintones. It contains 2.5 ml/0.08 fl oz in the kit and has a little brush to apply it. It's perfect to highlight the basic spots on your face and it makes them glow nicely. It lasts pretty long, but kinda fades a little after a whilte. It makes you look really fresh and natural, because the shimmer particles aren't too big.
here you can see the difference between HighBeam (1) and Girl Meets Pearl (2)


Benefit ErasePaste in Medium

ErasePaste is a very very creamy and opaque concealer. The color in the Kit is medium which is luckily light enough for my skin. The color's a little peachy, not a true skin-tone color, so it's perfect for bluish undereye circles. There it's pretty opaque and covers most of the dark cirkles. You only need a tiny bit because it's so creamy. The only thing I don't really like is that the creaminess makes it sticky. It has a weird feeling when you touch your eye when you have it on, a little gross. It's also not totally matte, which can be good because it doesn't enhance wrinkles. I'd almost say it has some light-reflecting particles in it, but I'm not sure about it. It contains 3.2 g/0.11 oz. and is pretty longlasting.


I hope this review helped you out! I do recommend this stuff, and the kit is a nice chance to try out all of these things in mini sizes. These "sample" sizes will go a long way, so this might be even better to get for some people. If you like the stuff, get the kit :) But if ErasePaste in medium is too dark for you, it's not totally worth getting it.
What do you think?
xoxo, Misch