Hey everyone,
HAPPY HALLOWEEN!
I hope you all have a fun day, eat lots of candy and dress up as whoever you'd like to be! Have some fun today! :)
More posts are coming up soon, promise!
xoxo, Misch

Showing posts with label halloween. Show all posts
Showing posts with label halloween. Show all posts
Thursday, 31 October 2013

Monday, 21 October 2013
NOTD October 21st: Halloween Doodles
Hey there!
With Halloween approaching, I wanted to do some nail art for that occasion!
 I just went for some random Halloween-themed doodles in black, on a base of orange. The shade is My Paprika Is Hotter Than Yours by OPI.
What do you think of it? Do you have any ideas for some more Halloween nail art designs?
xoxo, Misch
With Halloween approaching, I wanted to do some nail art for that occasion!

What do you think of it? Do you have any ideas for some more Halloween nail art designs?
xoxo, Misch
Wednesday, 31 October 2012
Happy Halloween!
Hey guys!
I wish all of you a very happy Halloween! I hope you have lots of fun dressing up and going trick-or-treat-ing :D Or whatever else you might do :D
What are your plans for tonight? I'll be at a friend's costume party :)
See you later,
xoxo, Misch
I wish all of you a very happy Halloween! I hope you have lots of fun dressing up and going trick-or-treat-ing :D Or whatever else you might do :D
What are your plans for tonight? I'll be at a friend's costume party :)
See you later,
xoxo, Misch
Tuesday, 30 October 2012
NOTD October 30th: Essence Breaking Dawn Part 2 LE - 01 Jacob's Protection + Ghost Nail Art
Hey guys!
Today I want to show you the first polish of Essence's Breaking Dawn Part 2 LE, called 01 Jacob's Protection.
 Jacob's Protection is a deep blackened blue with blue and silver shimmer particles. The shimmer makes it very interesting, it adds a lot of dimension.
Application was okay, it was a little too thick! The brush is also very thick, not so much the best combination, but you can definitely make it work.
 I really like this shade, it's glowy and really pretty :)
And, since Halloween's almost here, I had do something with it. I ended up putting ghosties on top! They're like little marshmallow ghosts :D

 I painted the ghosts on a sandwich bag and then stuck them onto my nails.
What do you think of them?
xoxo, Misch
Today I want to show you the first polish of Essence's Breaking Dawn Part 2 LE, called 01 Jacob's Protection.

Application was okay, it was a little too thick! The brush is also very thick, not so much the best combination, but you can definitely make it work.

And, since Halloween's almost here, I had do something with it. I ended up putting ghosties on top! They're like little marshmallow ghosts :D


What do you think of them?
xoxo, Misch
Saturday, 27 October 2012
NOTD October 27th: Spider Nail Art
Hi there!
Today I'd like to show you my next Halloween nail art, Spiders!
 I went for a orange background, and created both the spider's web and the spiders themselves in black.
I know the spiders look a little weird as they don't have enough legs, but I thought they were cuter that way.
What do you think of them?
 xoxo, Misch
Today I'd like to show you my next Halloween nail art, Spiders!

I know the spiders look a little weird as they don't have enough legs, but I thought they were cuter that way.
What do you think of them?

Thursday, 25 October 2012
NOTD October 25th: Jack O'Lantern Nail Art
Hey guys!
I know I'm a little late for starting a Halloween series, but better late than never, right? So in the next couple of days I'd like to show you some Halloween nail art and stuff like that :) We still have a whole week till then!

As a start into the Halloween season I picked Jack O'Lanterns. I drew them onto a nude background and put scary faces on them. I'm actually happy with the way these turned out, even though the pumpkin shapes kinda look like apples :D
 To give you an overview of what I've already done, here are last year's Halloween nail art designs:
Jack O'Lanterns
Spiders
Mummies
Frankensteins
Bats
Blood Splatter
I might be doing some of these again, but put a different spin on them :)
What are your costume plans for Halloween?
xoxo, Misch
I know I'm a little late for starting a Halloween series, but better late than never, right? So in the next couple of days I'd like to show you some Halloween nail art and stuff like that :) We still have a whole week till then!

As a start into the Halloween season I picked Jack O'Lanterns. I drew them onto a nude background and put scary faces on them. I'm actually happy with the way these turned out, even though the pumpkin shapes kinda look like apples :D

Jack O'Lanterns
Spiders
Mummies
Frankensteins
Bats
Blood Splatter
I might be doing some of these again, but put a different spin on them :)
What are your costume plans for Halloween?
xoxo, Misch
Monday, 31 October 2011
Halloween: NOTD October 31st: Blood Splatter
Hey guys,
HAPPY HALLOWEEN! :)
Here's my final for today, Halloween! I did a mani that is kinda similar to one I already did quite a while back here *click*. But I think this time I did a better job :D

 For the base color I chose a nude, Manhattan 95E. And the splatter was again done with a straw and 2 different reds: China Glaze - Hey Sailor! and Essence - Thirsty. I used 2 reds to make it look a bit more creepy, like wet and dried blood :D It's not too creepy, though, it's also kinda pretty :)

 Here you have a swatch of Manhattan 95E on its own. It was part of the Manhattan and Buffalo collection, and I'm so glad I bought this one, because it's a perfect neutral nude that just needs 1 coat if you paint a little thicker! YAY!

 I like this mani a lot, and if I went to a costume party tonight, I'd be a vampire :)
And btw, I'm totally gonna do this mani with dark blue one day, so it'll look like splattered ink :D
What have you planned for Halloween? Are you even doing something? Or staying at home like I do?
See you!
xoxo, Misch
HAPPY HALLOWEEN! :)
Here's my final for today, Halloween! I did a mani that is kinda similar to one I already did quite a while back here *click*. But I think this time I did a better job :D


And btw, I'm totally gonna do this mani with dark blue one day, so it'll look like splattered ink :D
What have you planned for Halloween? Are you even doing something? Or staying at home like I do?
See you!
xoxo, Misch
Saturday, 29 October 2011
NOTD October 29th: Jack O'Lantern Nail Art
Hello there!
This is another nail art design for Halloween, the Pumpkin design that's kinda obligatory for a Halloween series. And it was a lot of fun to do it!

 For the pumpkin orange base color I used a orange franken. It's a tad too dark, but I'm fine with it. Then I added some glitter stripes to add a little something extra, and for that I used L.A.Colors Nail Art Deco in Copper Glitter. And the faces were drawn with Essence Fatal and a toothpick. It's really easy to do, and so perfect for Halloween. And it also looks great on short nails because the rather round form of them makes it look more like pumpkins ;)

 Do you like this one?
One more design is missing, and I'll see you on Halloween with that!
Until next time,
xoxo, Misch
This is another nail art design for Halloween, the Pumpkin design that's kinda obligatory for a Halloween series. And it was a lot of fun to do it!


One more design is missing, and I'll see you on Halloween with that!
Until next time,
xoxo, Misch
Thursday, 27 October 2011
NOTD October 27th: Frankenstein Nail Art
Hi everyone,
here's the next Halloween nail art design, and it's Frankstein Monster Nails! I got the idea from Kayla Shevonne *click*, and I loved it!


For the base color I used Essence Color&Go - Check Me Out. All of the black parts were done with Essence - Fatal and a toothpick, and the white part of the eyes was Essence - Ahoy.


Do you like it?
Until then,
xoxo, Misch
Tuesday, 25 October 2011
NOTD October 25th: Bat Nail Art
Hello dear readers!
Today I want to show you another Halloween Nail Art design, and this time it's bats! YAY :D
 I wanted the background to be a gradient, and had first decided on purple. But unfortunately that turned out to be too dark, so I took a lighter gray. I first applied Manhattan - Gossip Girl, and then sponged the tips with that Manhattan polish and a drop of Astor - VIP Grey, which is a dark gray. On top of that I used a coat of a Essence Glitter Polish that I don't know the name of. It's just a thin layer of glitter, not too noticeable.
For the bats I used Essence - Fatal and the Essence Stylist. They were really easy to draw, you can achieve the typical bat shape really fast.

 I especially love the contrast of the dark bats and the lighter background, and also that the background has some glitter, and the bats not.
Do you like this design? What have you planned for Halloween?
Until next time,
xoxo, Misch
Today I want to show you another Halloween Nail Art design, and this time it's bats! YAY :D

For the bats I used Essence - Fatal and the Essence Stylist. They were really easy to draw, you can achieve the typical bat shape really fast.


Do you like this design? What have you planned for Halloween?
Until next time,
xoxo, Misch
Sunday, 23 October 2011
NOTD October 23rd: Mummy Nails
Hi everyone!
Today I want to show you a nail art design that is appropriate for Halloween. It's mummy nails!
I made mine after I saw this tutorial *click* on Youtube. And I liked it so much that I just had to do it!
 The white is Essence - Ahoy as both the background and the eyes. To make the mummy look a bit more real and old, I sponged on Essence - It's khaki time. And all of the black parts are made with RdLY - nail art pen black.
 Do you like this design as much as I do? It's perfect for Halloween but still a bit cute ;)
I'll talk to you later :)
xoxo, Misch
Today I want to show you a nail art design that is appropriate for Halloween. It's mummy nails!
I made mine after I saw this tutorial *click* on Youtube. And I liked it so much that I just had to do it!


I'll talk to you later :)
xoxo, Misch
Friday, 21 October 2011
NOTD October 21st: Catrice - Hip Queens Wear Blue Jeans with Spider Nail Art
Hello dear readers!
Today's polish is by Catrice, and it's called Hip Queens Wear Blue Jeans, and unfortunately it got discontinued this fall :/ It's a dark denim blue creme, with jsut a few tiny bright blue glitter particles. But you can barely see themm when I applied it I wasn't even able to tell the glitter.

 It applied nicely and evenly, it's opaque with 2 coats, really great.
 And then, because it's gonna be Halloween soon, I did a design with it. I used a nail art brush and Essence Stampy Polish in white for the spider's webs. And over top I applied randomly L.A.Colors Nail Art Deco in Silver Glitter. For the spiders I used p2 - eternal, and a nail art brush again.

 It's so simple, but perfect for Halloween. The only thing I don't like is that the background is a bit too dark for the spider. But, oh, well ;)
Do you like it? And what kind of Halloween designs do you like?
Until next time,
xoxo, Misch
Today's polish is by Catrice, and it's called Hip Queens Wear Blue Jeans, and unfortunately it got discontinued this fall :/ It's a dark denim blue creme, with jsut a few tiny bright blue glitter particles. But you can barely see themm when I applied it I wasn't even able to tell the glitter.


Do you like it? And what kind of Halloween designs do you like?
Until next time,
xoxo, Misch
Sunday, 24 October 2010
Halloween Tutorials: Pin Up Look + Use It Up! Product 7 & 8
Hi there,
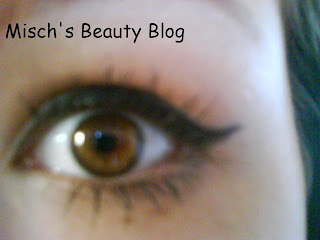


today I have something a little more simple for Halloween: a really basic Pin Up Look.
For this look there are 2 important things: the dramatic black eyeliner with a wing and the bright red lips.
Eyes:
You can use whatever you want, a gel liner, liquid liner or a pencil liner. I first used a very sharp pencil liner and lined my eye without doing the wing. The line should be pretty think and defined. Then you want to start to draw on you wing. Draw it piece-by-piece and take your time with it. Try to find a look that works for your eyeshape. Make sure both eyes are even. If it didn't work, just remove it and start again.
Now you want to take an angled brush and a matte black eyeshadow and go over the eyeliner. This will make it even darker and it'll make it last longer.
To really get the defined look, take an eyeshadow in the color of your skintone and pick it up with the angled brush (if you're using the same brush as before, clean it on the back of you hand first!). Now go around the eyeliner and the wing you created. That will make the liner look even harsher and more defined.
Lips:
The lips are supposed to be bright red. I don't have a bright red lipstick, so I used a trick to get the bright red lips. But let's start with lining your lips with a natural skintoned lipliner. This will create the base for the color.
Now, go ahead and use yo0ur red lipstick, but if you don't have one, do this trick: Use a red eyeshadow and vaseline! I'm sure some of you own the 120 palette or one of the colorful Coastal Scents 88 palettes, and these contain red eyeshadows. So what you want to do is pick up some of the eyeshadow with a brush or a sponge-tip applicator, and get it onto the back of your hand. The take some vaseline and mix it with the red eyeshadow. Apply the mixed product onto you lips with your fingers or a lip brush. This trick works for any color, so if you are going for a specific lip color, just use an eyeshadow! And vaseline will also care your lips.
Now take your concealer and an angled or tapered brush. Pick some of the concealer up and go around the contour of your lips. This will define them really sharply.
Use It Up!:
I finally used up some more products! A topcoat by RdL, which I had for a while now and it got kinda thick...got it empty!
And then a lipbalm on velvet rose by Labello. This isn't my favorite lipbalm ever, but I still had it laying around here, so I used it up!
I hope you liked this tutorial!
I'll see you later!
xoxo, Misch
Friday, 22 October 2010
Halloween Tutorials: Crazy Purple Look
Hi guys,


here's another Halloween tutorial for you.
This one is really creative and crazy, just right for Halloween! For this look I almost just used pigments.
Let's get started:
First apply a creamy black pencil liner (Essence black mania pencil liner) messily aroud your eye, only leaving out the inner corner.
Now you want to smudge this eyeliner. You can use you finger, a brush, a q-tip or a smudger. It's supposed to be very smoked out and to have a cat-eye shape.
Time for the eyeshadows! The black was just the base, and now we're gonna use purple and a bit of pink! Start at the outer corner and apply a shimmery dark purple pigment (I used [b]basic classic glam pigment in purple) along the outer cat-eye area. Then next to it, on the top lid, you wanna place a a bit lighter purple (Jesse's Girl eye dust in ultra violet) and next to that one, a purple-ish pink (Jesse's Girl eye dust in peek-a-boo). Use a shimmery white for the inner corner (Jesse's Girl eye dust in pixiedust). Then you want to darken up the crease. First use a grey color (Jesse's Girl eye dust in hi-ho silver) for that, and then a black (Jesse's Girl eye dust in blackstar blue). Always follow the shape you created with the eyeliner at the beginning.
On the lower lashline, apply a pink pigment ([b]basic classic glam pigment in pink) and blend it down pretty far.
Add some black pencil liner (Essence black mania pencil liner) to the top lashline, the waterline and the tightline. Add black mascara and fake lashes if you want (I don't.).
The rest of your face should be kept really natural.
So what would you wear this look for? A witch? Another magic person? Tell me!
I'm gonna do a few more looks before it's Halloween next week.
I'll see you later!
xoxo, Misch
Monday, 18 October 2010
Halloween Tutorials: Torquoise Mermaid Look
Hey Beauties,


today I have another Halloween look for you guys! It's torquoise and would be perfect to wear if you are a mermaid for halloween :)
Let's get started:
First you want to select a shimmery torquoise color (mine is from the 120 palette) and apply it to you a bit over your crease, creating more of a cut crease. Then take a blue-ish torquoise color (120 palette) and blend it underneath the crease color, towards the lid. Then take a flat eyeshadow brush and apply a opaque creme color onto the lid, slightly blending it into the colorful crease. This color should be matte (I used the Catrice Nude Sensation eyeshadow in nude cream) so there is a contrast between the colors. There shouldn't be that much of a transition, make the line of separation pretty visible. Use a white pencil liner as you highlight on both the inner corner and the brow bone (Essence kajal pencil in white).
Apply a shimmery blue color that is more intense than the crease colors along you lower lashline (Alverde baked eyeshadow in intensive torquoise).
Now onto the eyeliner. I used a pencil liner (Essence Black Mania eye pencil), make sure it's sharpened! You want to line your top lashline and create a wing, same goes for the lower lashline. Make sure not to paint your waterliner, just the lashline! Apply black mascara.
Then you're done!
This look is pretty simple, but still not the same as any other look, especially because of the colored crease with no blending. Only the eyeliner could be a bit hard to do, but just go ahead and try it!
I hope you liked this one and I'll see you soon!
xoxo, Misch
Subscribe to:
Posts (Atom)