Sunday, 24 October 2010

Halloween Tutorials: Pin Up Look + Use It Up! Product 7 & 8

Hi there,
today I have something a little more simple for Halloween: a really basic Pin Up Look.
For this look there are 2 important things: the dramatic black eyeliner with a wing and the bright red lips.

Eyes:
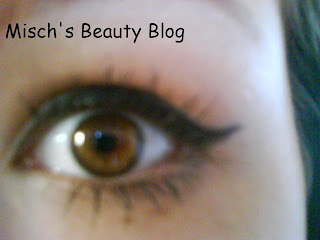
You can use whatever you want, a gel liner, liquid liner or a pencil liner. I first used a very sharp pencil liner and lined my eye without doing the wing. The line should be pretty think and defined. Then you want to start to draw on you wing. Draw it piece-by-piece and take your time with it. Try to find a look that works for your eyeshape. Make sure both eyes are even. If it didn't work, just remove it and start again.
Now you want to take an angled brush and a matte black eyeshadow and go over the eyeliner. This will make it even darker and it'll make it last longer.
To really get the defined look, take an eyeshadow in the color of your skintone and pick it up with the angled brush (if you're using the same brush as before, clean it on the back of you hand first!). Now go around the eyeliner and the wing you created. That will make the liner look even harsher and more defined.

Lips:
The lips are supposed to be bright red. I don't have a bright red lipstick, so I used a trick to get the bright red lips. But let's start with lining your lips with a natural skintoned lipliner. This will create the base for the color.
Now, go ahead and use yo0ur red lipstick, but if you don't have one, do this trick: Use a red eyeshadow and vaseline! I'm sure some of you own the 120 palette or one of the colorful Coastal Scents 88 palettes, and these contain red eyeshadows. So what you want to do is pick up some of the eyeshadow with a brush or a sponge-tip applicator, and get it onto the back of your hand. The take some vaseline and mix it with the red eyeshadow. Apply the mixed product onto you lips with your fingers or a lip brush. This trick works for any color, so if you are going for a specific lip color, just use an eyeshadow! And vaseline will also care your lips.
Now take your concealer and an angled or tapered brush. Pick some of the concealer up and go around the contour of your lips. This will define them really sharply.

Use It Up!:
I finally used up some more products! A topcoat by RdL, which I had for a while now and it got kinda thick...got it empty!
And then a lipbalm on velvet rose by Labello. This isn't my favorite lipbalm ever, but I still had it laying around here, so I used it up!

I hope you liked this tutorial!
I'll see you later!
xoxo, Misch

Saturday, 23 October 2010

Review: Essence Multi Color Blush

Hi Beauties!
here's another review for a product from the new Essence permanent line: one of the multi color blushes!

Basic Information:
The blush is available in two colors, the one I got is called "How cute is that?" (love the name). It contains 5 gramms and costs around 2.75 Euros.

Color and Pigmentation:
The colors in this blush are white, light pink, peach, coral and light brown. They aren't shimmery or glittery, but not exactly matte either, it's more of a sheen. The single color stripes are really small, so you aren't able to use just one color, you have to take all of them. Mixed together they make a light rosy-peachy color.
The blush isn't exactly pigmented. You only get out enough when you really scrape your finger or brush into it. On the face, they aren't that visible, only like a sheen.
It's more like a highlighter, even for really light skintones.
Wear:
The blush is pretty longlasting, you just won't notice it that much because the color is so light. It definitely stayed for a few hours.

POSITIVE:
+ price
+ longlasting
+ not full of glitter or shimmer

NEGATIVE:
- color stripes are too small to use single colors
- very light, more like a highlighter, but no blush
- bad pigmentation

Do I recommend it?
Not really. If you are searching for a nice highlighter, this one might be good for you, but if you actually want the colors it seems to have, don't get it. It's not that much of a great product.

Does anyone of you own this blush as well? What do you think of it?
Until next time!
Bye, Misch

Friday, 22 October 2010

Halloween Tutorials: Crazy Purple Look

Hi guys,


here's another Halloween tutorial for you.
This one is really creative and crazy, just right for Halloween! For this look I almost just used pigments.
Let's get started:
First apply a creamy black pencil liner (Essence black mania pencil liner) messily aroud your eye, only leaving out the inner corner.
Now you want to smudge this eyeliner. You can use you finger, a brush, a q-tip or a smudger. It's supposed to be very smoked out and to have a cat-eye shape.
Time for the eyeshadows! The black was just the base, and now we're gonna use purple and a bit of pink! Start at the outer corner and apply a shimmery dark purple pigment (I used [b]basic classic glam pigment in purple) along the outer cat-eye area. Then next to it, on the top lid, you wanna place a a bit lighter purple (Jesse's Girl eye dust in ultra violet) and next to that one, a purple-ish pink (Jesse's Girl eye dust in peek-a-boo). Use a shimmery white for the inner corner (Jesse's Girl eye dust in pixiedust). Then you want to darken up the crease. First use a grey color (Jesse's Girl eye dust in hi-ho silver) for that, and then a black (Jesse's Girl eye dust in blackstar blue). Always follow the shape you created with the eyeliner at the beginning.
On the lower lashline, apply a pink pigment ([b]basic classic glam pigment in pink) and blend it down pretty far.
Add some black pencil liner (Essence black mania pencil liner) to the top lashline, the waterline and the tightline. Add black mascara and fake lashes if you want (I don't.).
The rest of your face should be kept really natural.
So what would you wear this look for? A witch? Another magic person? Tell me!
I'm gonna do a few more looks before it's Halloween next week.

I'll see you later!
xoxo, Misch

Tuesday, 19 October 2010

Clinique Anti Blemish Solutions Skincare Line - Week 3

Hey everyone!
this is just a quick update on my experiences with the Clinique Anti Blemish Solutions Skincare Line.
This week it basically did nothing for my skin. The huge brakouts it caused me last week got removed, but only partly. My skin didn't really get any worse, nor did it get better. I have no idea whether it'll help me in the future.
Ther toner is now about half way empty, and the moisturizer is also getting a bit less. Only the soap still seams to be almost as big as before.
Something I thought about is, that since I'm in my teenage years, it might not do abything at all against my breakouts and acne, because these are caused by hormons. I think I just have these huge expectation in the line, because it's so expensive and I heard good things about it.

I'll see you guys later!
xoxo, Misch

Monday, 18 October 2010

Halloween Tutorials: Torquoise Mermaid Look

Hey Beauties,
today I have another Halloween look for you guys! It's torquoise and would be perfect to wear if you are a mermaid for halloween :)
Let's get started:
First you want to select a shimmery torquoise color (mine is from the 120 palette) and apply it to you a bit over your crease, creating more of a cut crease. Then take a blue-ish torquoise color (120 palette) and blend it underneath the crease color, towards the lid. Then take a flat eyeshadow brush and apply a opaque creme color onto the lid, slightly blending it into the colorful crease. This color should be matte (I used the Catrice Nude Sensation eyeshadow in nude cream) so there is a contrast between the colors. There shouldn't be that much of a transition, make the line of separation pretty visible. Use a white pencil liner as you highlight on both the inner corner and the brow bone (Essence kajal pencil in white).
Apply a shimmery blue color that is more intense than the crease colors along you lower lashline (Alverde baked eyeshadow in intensive torquoise).
Now onto the eyeliner. I used a pencil liner (Essence Black Mania eye pencil), make sure it's sharpened! You want to line your top lashline and create a wing, same goes for the lower lashline. Make sure not to paint your waterliner, just the lashline! Apply black mascara.
Then you're done!
This look is pretty simple, but still not the same as any other look, especially because of the colored crease with no blending. Only the eyeliner could be a bit hard to do, but just go ahead and try it!
I hope you liked this one and I'll see you soon!
xoxo, Misch

Sunday, 17 October 2010

Haul: OPI & China Glaze


Hi there,
I have a haul today! Yay, I haven't posted one in a while which means I was pretty good, but about two weeks ago I just couldn't say no. There was a really good exchange rate, so I was able to get these polishes for not that much money, and, I saw swatches of the latest OPI collections and had to have some :) Luckily Trasdesign already had them, so I ordered 3 OPI nail polishes and 2 China Glaze colors.

These are the colors I got:
OPI Swiss Collection : I'm Suzi & I'm a Chocoholic. A really pretty brownish red brick creme.
OPI Burlesque Collection : Sparkle-icious. A clear polish with gold, purple and blue glitter in it.
OPI Burlesque Collection: Risin Star. A bronze-y gold shimmer color.
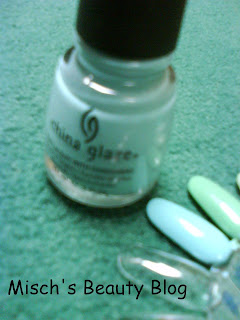
China Glaze : For Audrey. A pale torquoise creme, looks like the packages Tiffany jewelry comes in.
China Glaze Summer Days Collection (last year) : Strawberry Fields. A pink with gold glass-flecks in it.
I love all of the polishes, they're so pretty! Expect some NOTD coming up! :)

That's it for today, I'll see you soon!
Bye, Misch

Saturday, 16 October 2010

EOTD October 16th: Nude Look and Bright Eyes

Hi guys,
y'all wanted some neutral looks and here is the first one I'm gonna show you!

First you want to have completely clean eyes. Apply eyecream if you use one.
Then you want to apply concealer to your undereye area, especially to your dark circles. I used the Maybelline dream mousse concealer in 04 rose beige
Next you want to define you eyebrows. I first applied the Rival de Loop eyebrow pencil in medium brown, and then fixed it with the Rival de Loop Young browgel.
Now you want to apply you eyeshadow base. This will even out your lid, keep the eyeshadows from creasing, makes them appear brighter and lets them last longer. I used the Rival de Loop Young eyeshadow base, but the old one without shimmer.
Apply a matte brown color to your crease, using a fluffy blending brush. It's not supposed to darken the look, just to give your eyes more dimension. I used Essence Soft Matt eyeshadow in silky smooth.
Then you want to put white eyeliner (pencil liner) underneath the arch of your brow and to your inner corner, this will brighten up you eyes. I used the Essence kajal pencil in white.
Blend the white eyeliner to achieve the natural look.
Finish off by using brown or black mascara on both your top and bottom lashes. I used the Maybelline Colossal Volum' Express.
That's the finished look!
It's super qucick and really easy! I hope you liked it!
Bye, Misch