Hi there!
Today I'd like to show you China Glaze's Champagne Kisses, which I wore for Valentine's Day yesterday.
Champagne Kisses is a is golden champagne (didn't expect that, right?! :D) glitter nail polish. It's quite densely packed with glitter and dries to a gritty finish. It can look slightly holographic in some lighting.
Application was good, it was quite opaque even though it's just a glitter, I did 3 thin coats but 2 would have been enough.
Champagne Kisses looks very christmas-y, and it actually originally was part of China Glaze's Holiday 2012 Collection, called Holiday Joy. However, I think it can also be worn now, and it wasn't really bad for Valentine's Day! On top I added little red hearts to make it a bit more appropriate :)
What do you think of this nail polish?
xoxo, Misch
Showing posts with label valentine. Show all posts
Friday, 15 February 2013
Thursday, 14 February 2013
Happy Valentine's Day!
Hi everyone,
a very happy Valentine's Day to all of you!
I wish all of you a great day spent with someone you love :) No matter whether it's your spouse, best friend or family, just have a great and lovely day!
I love all of you, thank you so much for being my readers and making me enjoy blogging so much :)
So, have a nice day and remember: love is not only limited to Valentine's Day! :D
a very happy Valentine's Day to all of you!
I wish all of you a great day spent with someone you love :) No matter whether it's your spouse, best friend or family, just have a great and lovely day!
I love all of you, thank you so much for being my readers and making me enjoy blogging so much :)
So, have a nice day and remember: love is not only limited to Valentine's Day! :D
Here are some roses for you! :)
xoxo, Misch
Monday, 11 February 2013
NOTD February 11th: Heart Nail Art with China Glaze - Light As Air
Hi everyone!
Today I'd like to show you a cute nail art design using China Glaze's Light As Air.
Light As Air is a light lilac creme. It's slightly muted and is a very cool-toned shade.Today I'd like to show you a cute nail art design using China Glaze's Light As Air.
Application was great, it has a good consistency which looks great with 2 coats. Here I did 3 to cover up some patches I thought were still visible.
Light As Air was part of the Up & Away Collection of 2010, but should still be available in lots of places.
On top of Light As Air I added little black hearts, a very cute but simple pattern. I just used a dotting tool to create them. This could be something to wear for the upcoming Valentine's Day!
What do you think of it?
xoxo, Misch
Wednesday, 15 February 2012
NOTD February 15th: Valentine's Day Manis
Hey everyone,
I hope you all had a great Valentine's Day yesterday! :) I want to show you 2 manis that I was wearing for Valentine's Day, I'm sorry I'm so late with them! I know, it doesn't really make sense to post them now, since Valentine's over, but just to make it complete, I want to show you some pictures. I just had so many other important things to blog about so I totally missed posting them in time ;) Sorry!
The first mani is a Plaid Heart design. It was inspired by this *click* video by Cutepolish, I just changed the colors so it wasn't too pink.
The other one is the design I actually wore for Valentine's Day. It's bright red with white drawings, and that includes lace and hearts. For the lace I already showed you a tutorial here *click* last year.
What do you think of these designs?
xoxo, Misch
I hope you all had a great Valentine's Day yesterday! :) I want to show you 2 manis that I was wearing for Valentine's Day, I'm sorry I'm so late with them! I know, it doesn't really make sense to post them now, since Valentine's over, but just to make it complete, I want to show you some pictures. I just had so many other important things to blog about so I totally missed posting them in time ;) Sorry!
The first mani is a Plaid Heart design. It was inspired by this *click* video by Cutepolish, I just changed the colors so it wasn't too pink.
The other one is the design I actually wore for Valentine's Day. It's bright red with white drawings, and that includes lace and hearts. For the lace I already showed you a tutorial here *click* last year.
What do you think of these designs?
xoxo, Misch
Tuesday, 14 February 2012
Happy Valentine's Day! :)
Hello dear reads!
a very happy Valentine's Day to all of you!
I hope you're spending this day with someone you love, and that you'll have a great time!
And if you're not a Valentine's Day supporter, I still hope you're having a great day :)
I don't think you necessarily have to spend it with a boyfriend/husband whatsoever, because even if you're single you can enjoy Valentine's Day. That's what I do, too :) I'm also single and I'll be spending my day with a few lovely girlfriends :)
Celebrate today, show your love to people and be happy!
I love all of you,
xoxo, Misch
a very happy Valentine's Day to all of you!
I hope you're spending this day with someone you love, and that you'll have a great time!
And if you're not a Valentine's Day supporter, I still hope you're having a great day :)
I don't think you necessarily have to spend it with a boyfriend/husband whatsoever, because even if you're single you can enjoy Valentine's Day. That's what I do, too :) I'm also single and I'll be spending my day with a few lovely girlfriends :)
Celebrate today, show your love to people and be happy!
I love all of you,
xoxo, Misch
Sunday, 13 February 2011
Valentine's Series: Nail Art #4
Hey there!
This is my last Nail Art Design for Valentine's Day, and again, it's on a nail wheel.
Here we go:
That's what you need:
- a base coat of you choice (I used Essence pro white french)
- a bright red color (I used p2 it's hot)
- a black creme polish (I used p2 eternal)
- a white tip painter (I used essence white tip painter)
- your favorite top coat (I used Essence nail art sealing top coat
That's how to do it:
1. Use your base coat to protect your natural nails.
2. Paint all of your nails red, use as many coats as needed.
3. Add a black line over your tips, just as if you were doing a straight french tip manicure.
4. Separate the black and the red color by drawing a thin white line in between. Use either a tip painter or pour some white polish onto a piece of paper, pick it up with a toothpick and use that to create the thin line.
5. Seal the design with your favorite top coat.
This design was inspired by this look from the illamasqua throb collection *click*. In the collection the tips are white and the separation line is black, but I liked it better the other way round. Which one do you prefer?
This is my last Nail Art Design for Valentine's Day, and again, it's on a nail wheel.
Here we go:
That's what you need:
- a base coat of you choice (I used Essence pro white french)
- a bright red color (I used p2 it's hot)
- a black creme polish (I used p2 eternal)
- a white tip painter (I used essence white tip painter)
- your favorite top coat (I used Essence nail art sealing top coat
That's how to do it:
1. Use your base coat to protect your natural nails.
2. Paint all of your nails red, use as many coats as needed.
3. Add a black line over your tips, just as if you were doing a straight french tip manicure.
4. Separate the black and the red color by drawing a thin white line in between. Use either a tip painter or pour some white polish onto a piece of paper, pick it up with a toothpick and use that to create the thin line.
5. Seal the design with your favorite top coat.
This design was inspired by this look from the illamasqua throb collection *click*. In the collection the tips are white and the separation line is black, but I liked it better the other way round. Which one do you prefer?
xoxo, Misch
Tags:
essence,
illamasqua,
inspired look,
nail art,
nail polish,
p2,
tutorial/how-to,
valentine
Saturday, 12 February 2011
Valentine's Series: EOTD #2
Hi dear readers,
today I have a new look for Valentine's Day: Smokey Eyes!
They're so basic, everyone should know how to do them! And they always look great :) I did a little varitation, it's not the total typical smokey eyes look, but smiliar.
I thought, some of you might be going out at night on Valentine's Day with their husband/boyfriend, so this would be something great to wear.
I decided to do it in the basic way, which means that the highlight is on the center of the lid and the inner and outer corner are dark. I made it black and grey, but you can use the color you like. Normal smokey eyes are way more smokey and blended, but I liked it that way today ;) Hope you still like it!
That's what you need:
- an eyeshadow base/primer (I used the RdLY one)
- eyeshadows in black, silver, grey and white (I got all of them from my 120 palette)
- a black pencil liner (I used the Essence Black Mania one)
- black mascara (I used the RdLY diamond wish one)
That's how to do it:
1. Prime your lid with your eyeshadow base.
2. Apply the white color (no matter if it's matte or shimmery) on the center of your lid.
3. Take a grey color and blend it into the white, going around it. The grey shouldn't be that dark.
4. Pick up a darker grey and blend it into the lighter grey. just fade it outward again, and also add a little bit to your outer lower lashline.
5. Add a thin black line to the outer line.
And then blend that out. It should complete the faded look. You can do it as smokey as you want to, I didn't do it that much. Also drag it up as far as you like to.
6. Add a black eyeliner line to your upper lashline and to your waterline. Also apply black mascara to pull the look together.
And that's it! It's not to hard to do, just be careful to blend well enough and to make the fade even!
Do you like it??
I'll see you soon!
xoxo, Misch
today I have a new look for Valentine's Day: Smokey Eyes!
They're so basic, everyone should know how to do them! And they always look great :) I did a little varitation, it's not the total typical smokey eyes look, but smiliar.
I thought, some of you might be going out at night on Valentine's Day with their husband/boyfriend, so this would be something great to wear.
I decided to do it in the basic way, which means that the highlight is on the center of the lid and the inner and outer corner are dark. I made it black and grey, but you can use the color you like. Normal smokey eyes are way more smokey and blended, but I liked it that way today ;) Hope you still like it!
That's what you need:
- an eyeshadow base/primer (I used the RdLY one)
- eyeshadows in black, silver, grey and white (I got all of them from my 120 palette)
- a black pencil liner (I used the Essence Black Mania one)
- black mascara (I used the RdLY diamond wish one)
That's how to do it:
1. Prime your lid with your eyeshadow base.
2. Apply the white color (no matter if it's matte or shimmery) on the center of your lid.
3. Take a grey color and blend it into the white, going around it. The grey shouldn't be that dark.
4. Pick up a darker grey and blend it into the lighter grey. just fade it outward again, and also add a little bit to your outer lower lashline.
5. Add a thin black line to the outer line.
And then blend that out. It should complete the faded look. You can do it as smokey as you want to, I didn't do it that much. Also drag it up as far as you like to.
6. Add a black eyeliner line to your upper lashline and to your waterline. Also apply black mascara to pull the look together.
And that's it! It's not to hard to do, just be careful to blend well enough and to make the fade even!
Do you like it??
I'll see you soon!
xoxo, Misch
Tags:
120palette,
EOTD,
essence,
eyeliner,
eyeshadow,
mascara,
RdLY,
tutorial/how-to,
valentine
Friday, 11 February 2011
Valentine's Series: Nail Art #3
Hey dear readers,
today's post is another nail art for Valentine's Day. Again, I did it on a nail wheel, didn't have enough time for a full manicure.
Let's get started, shall we?
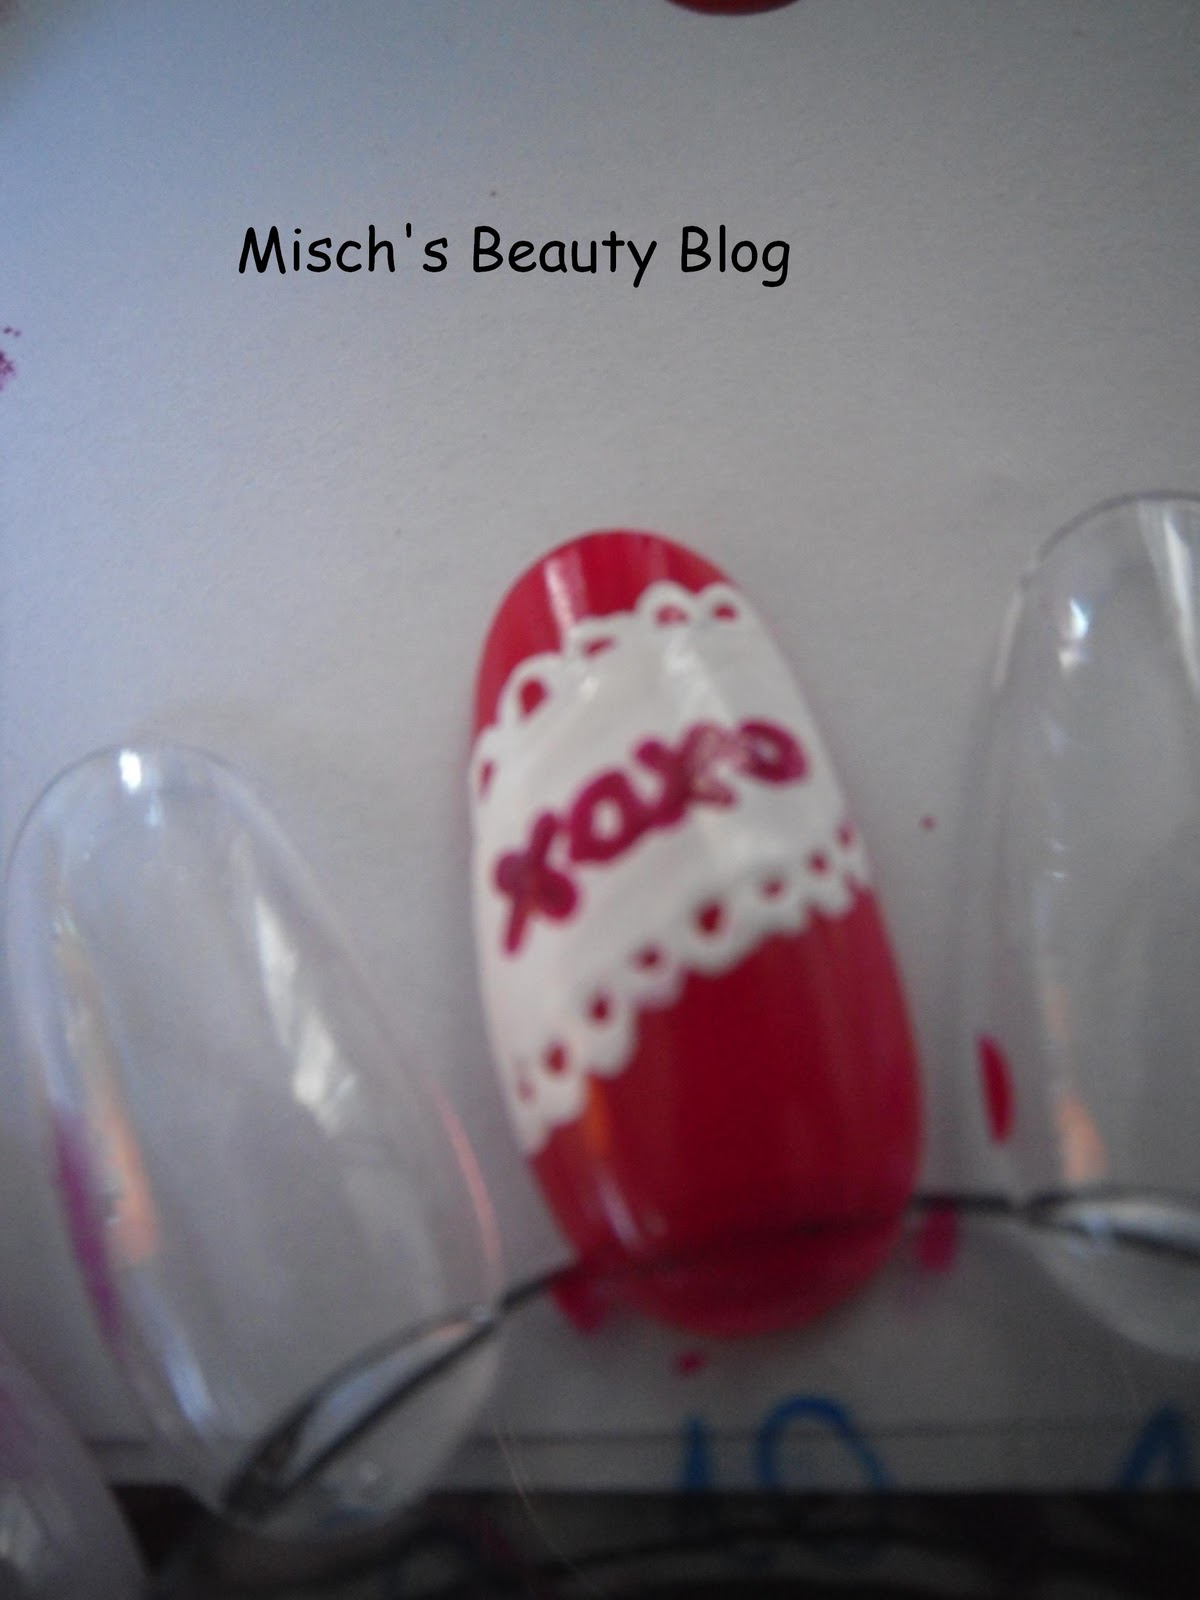
That's what you need:
- a base coat of you choice (I used Essence pro white french)
- a bright red (I used p2 it's hot)
- an opaque white polish (I used Essence Stampy Polish in white)
- a toothpick or other tool to draw with
- a pink polish (I used Hot Stuff by Essence)
- a top coat of your choice (I used Essence Nail Art Sealing Top Coat)
That's how to do it:
1. Use your base coat to protect your natural nails.
2. Paint all your nails with the red polish.
3. Take your white polish and draw a diagonal line over your nail.
4. Pour some of the white polish onto a piece of paper and pick it up with your toothpick or other tool. Then draw some tiny hoops along the outer lines or the diagonal stripe we just did. This is going to look like lace when it's finished, so just draw them on both sides all the ways down. You'll see what I mean in the pictures.
5. Pour some of the pink polish onto your piece of paper and pick it up with your tool. Now we're gonna write "xoxo" onto the middle white part. Do it very carefully and don't make it too hard. Just create it by doing lines and circles.
6. Seal your design with your favorite top coat.
And that's it! Easy, but really cute! What do you think?
Bye, Misch
today's post is another nail art for Valentine's Day. Again, I did it on a nail wheel, didn't have enough time for a full manicure.
Let's get started, shall we?
That's what you need:
- a base coat of you choice (I used Essence pro white french)
- a bright red (I used p2 it's hot)
- an opaque white polish (I used Essence Stampy Polish in white)
- a toothpick or other tool to draw with
- a pink polish (I used Hot Stuff by Essence)
- a top coat of your choice (I used Essence Nail Art Sealing Top Coat)
That's how to do it:
1. Use your base coat to protect your natural nails.
2. Paint all your nails with the red polish.
3. Take your white polish and draw a diagonal line over your nail.
4. Pour some of the white polish onto a piece of paper and pick it up with your toothpick or other tool. Then draw some tiny hoops along the outer lines or the diagonal stripe we just did. This is going to look like lace when it's finished, so just draw them on both sides all the ways down. You'll see what I mean in the pictures.
5. Pour some of the pink polish onto your piece of paper and pick it up with your tool. Now we're gonna write "xoxo" onto the middle white part. Do it very carefully and don't make it too hard. Just create it by doing lines and circles.
6. Seal your design with your favorite top coat.
And that's it! Easy, but really cute! What do you think?
Bye, Misch
Tags:
essence,
nail art,
nail polish,
p2,
tutorial/how-to,
valentine
Monday, 7 February 2011
Valentine's Series: Nail Art #2
Hey there,
today I have another nail art piece for Valentine's Day. I didn't do this one on my nails, because I didn't have enough time for a full manicure, so I just did it on a nail wheel. Hope you don't mind!
The design I did is pretty simple, it just takes some concentration and you need to be careful when drawing!
That's what you need:
- a base coat of you choice (I used Essence pro white french)
- an opaque white polish (I used Essence Stampy Polish in white)
- a bright red (I used p2 it's hot)
- a toothpick or other tool to draw with
- a top coat of your choice (I used Essence Nail Art Sealing Top Coat)
That's how to do it:
1. Use your base coat to protect your natural nails.
2. Paint all your nails with the white polish.
3. Pour some of the red polish onto a piece of paper and pick it up with your toothpick or other tool. Then draw some lip-shaped kisses onto your nails. It's pretty easy, just do a dew trials ahead of time, and then draw them carefully. For help, you can just look at a few pictures, like this one *click* Do as many kisses as you like, and make them as big or small as you like! :)
4. Seal your design with your favorite top coat.
I really like this design, it's easy but pretty, and it totally matched the whole Valentine's Day scheme. Do you like it??
xoxo, Misch
today I have another nail art piece for Valentine's Day. I didn't do this one on my nails, because I didn't have enough time for a full manicure, so I just did it on a nail wheel. Hope you don't mind!
The design I did is pretty simple, it just takes some concentration and you need to be careful when drawing!
That's what you need:
- a base coat of you choice (I used Essence pro white french)
- an opaque white polish (I used Essence Stampy Polish in white)
- a bright red (I used p2 it's hot)
- a toothpick or other tool to draw with
- a top coat of your choice (I used Essence Nail Art Sealing Top Coat)
That's how to do it:
1. Use your base coat to protect your natural nails.
2. Paint all your nails with the white polish.
3. Pour some of the red polish onto a piece of paper and pick it up with your toothpick or other tool. Then draw some lip-shaped kisses onto your nails. It's pretty easy, just do a dew trials ahead of time, and then draw them carefully. For help, you can just look at a few pictures, like this one *click* Do as many kisses as you like, and make them as big or small as you like! :)
4. Seal your design with your favorite top coat.
I really like this design, it's easy but pretty, and it totally matched the whole Valentine's Day scheme. Do you like it??
xoxo, Misch
Tags:
essence,
nail art,
nail polish,
p2,
tutorial/how-to,
valentine
Saturday, 5 February 2011
Valentine's Series: EOTD #1
Hi there!
This is my first Valentine's Day eye look :) It's a pink look with a little bit of brown. When you do pink looks, keep in mind that it can make you look tired and crying easily, so don't overdo it.
That's what you need:
- an eyeshadow base of your choice (I used the one by RdLY)
- a bright pink eyeshadow (I used one from an old duo by Essence, it was LE)
- a light shimmery pink color (I used a discontinued eyeshadown by the Manhattan MyBox Series)
- a cranberry eyeshadow (I used Spiced Red by Catrice from the Carame LE; it's a dupe for MAC cranberry)
- a shimmery brown color (I used the one from the mocca beige duo by RdL)
- a champagne color (I used the one from the mocca beige duo by RdL)
- a brown pencil liner (I used the p2 perfect look kajal in brown)
- black mascara (I used the diamond wish one by RdLY)
That's how to do it:
1. Apply an eyeshadow base of your choice all over your lid to prevent creasing.
2. Add the bright pink color to the center of your lid.
3. Apply your light pink shimmer color to the inner thrid of your lid.
4. Now slightly apply the cranberry color onto your v-area. You don't want to make it too vibrant, it should just give a nice red undertone for the following color.
5. Pick up your brown shimmery color and apply it to your crease. It should go over the cranberry color. Blend it out towards your brow. Also add a tiny bit of this color on the outer third of your lower lashline.
6. Add the champagne color to your brow bone and your inner corner to brighten your eye.
7. Line your top lashline and 2 thirds of your waterline with the brown eyepencil.
8. Add mascara to both your top and bottom lashes.
And that's it! I like it, because it uses pink, the go-to valentine color, but still doesn't make you look weird. What are you gonna wear on Valentine's Day?? I'll do some more looks, so you'll get inspired ;)
xoxo, Misch
Thursday, 3 February 2011
Valentine's Series: Nail Art #1: Hearts
Hey everyone,
as I did an EOTD series for Halloween and then a NOTD series for Christmas, I'm gonna do one for Valentine's Day :) I'll be doing not only one category, there'll be some EOTDs and NOTDs for sure!
Tell me if you want a certain design or anything!
Today I did a really cute nail design with hearts that is kinda ordinary for Valentine's Day, but I still liked to do it! To some of you it might be too cute, but you don't have to do it ;)
That's what you need:
- your favorite base coat (mine is Essence pro white french)
- a nude peach shimmer base color (I used China Glaze - Sunset Sail)
- a black nail polish (I used p2 eternal)
- a toothpick or any other tool (I used the Essence nail art stylist)
- a multi-color glitter polish (I used one by Essence, don't know the name, sorry)
- your favorite top coat (I used Essence Nail Art Sealing Top Coat)
That's how to do it:
1. Apply your base coat all over your nails to protect your natural nails.
2. Paint your nails with your nude peach color, use as many coats as needed.
3. Pour some black polish onto a piece of paper and pick it up with your tool/toothpick. Draw some hearts onto your nails. You decide how big they are, if you fill them in or not, how many you put onto one nail - just how you like it to be! :)
4. Add your glitter top coat if you want to, but this step is optional, of course!
5. Add your clear top coat to seal the design.
Btw, this is the China Glaze Polish on it's own:
I like it a lot, it's pretty :)
And that's it! Do you like it, or is it "too cute" for your style??
I'll see you soon!
xoxo, Misch
as I did an EOTD series for Halloween and then a NOTD series for Christmas, I'm gonna do one for Valentine's Day :) I'll be doing not only one category, there'll be some EOTDs and NOTDs for sure!
Tell me if you want a certain design or anything!
Today I did a really cute nail design with hearts that is kinda ordinary for Valentine's Day, but I still liked to do it! To some of you it might be too cute, but you don't have to do it ;)
That's what you need:
- your favorite base coat (mine is Essence pro white french)
- a nude peach shimmer base color (I used China Glaze - Sunset Sail)
- a black nail polish (I used p2 eternal)
- a toothpick or any other tool (I used the Essence nail art stylist)
- a multi-color glitter polish (I used one by Essence, don't know the name, sorry)
- your favorite top coat (I used Essence Nail Art Sealing Top Coat)
That's how to do it:
1. Apply your base coat all over your nails to protect your natural nails.
2. Paint your nails with your nude peach color, use as many coats as needed.
3. Pour some black polish onto a piece of paper and pick it up with your tool/toothpick. Draw some hearts onto your nails. You decide how big they are, if you fill them in or not, how many you put onto one nail - just how you like it to be! :)
4. Add your glitter top coat if you want to, but this step is optional, of course!
5. Add your clear top coat to seal the design.
Btw, this is the China Glaze Polish on it's own:
I like it a lot, it's pretty :)
And that's it! Do you like it, or is it "too cute" for your style??
I'll see you soon!
xoxo, Misch
Tags:
China Glaze,
essence,
nail art,
nail polish,
NOTD,
p2,
tutorial/how-to,
valentine
Subscribe to:
Posts (Atom)